Showing posts with label free pattern. Show all posts

Sunday, 21 October 2012

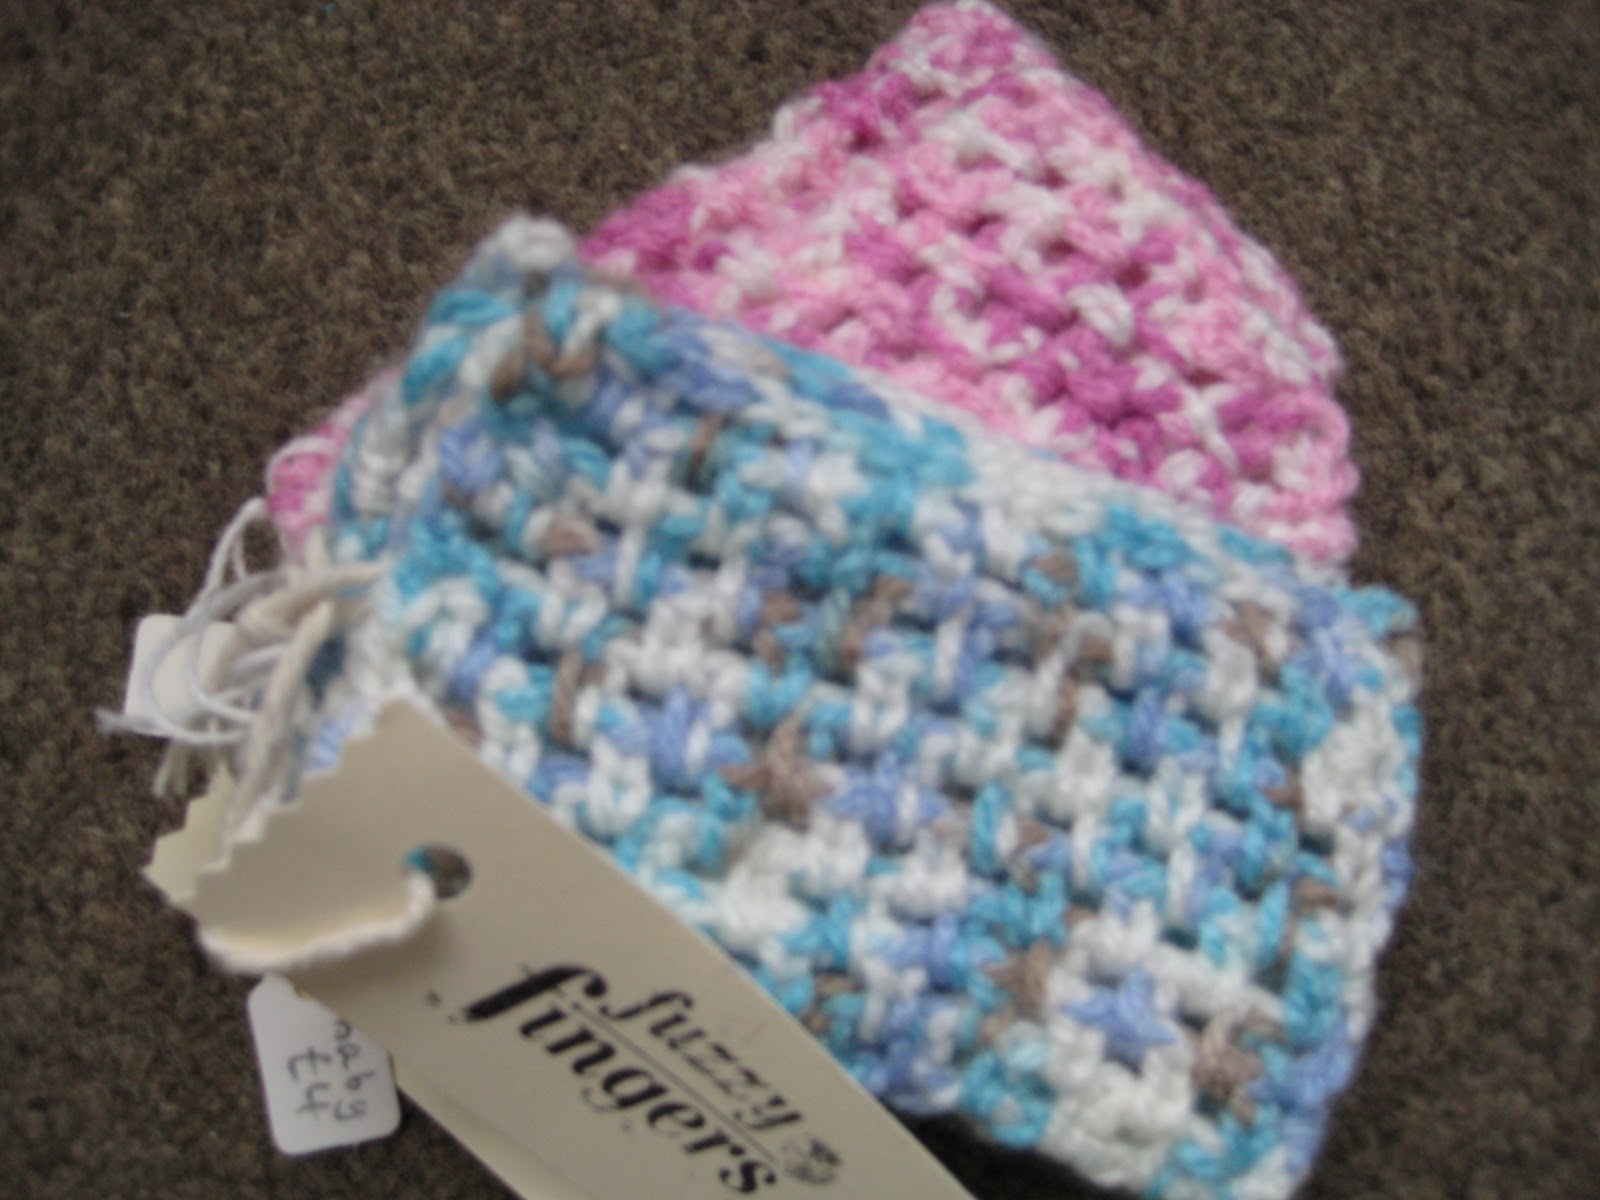
Textured Handhuggers

Following on in a series of FREE ( yes, free!) crochet patterns that I have designed, comes the pattern for a set of gorgeous stylish fingerless wrist/hand warmers. 

Using a super easy construction method, and a simple but effective stitch pattern, these textured hand huggers are super warm, practical and versatile.  They hook up really quickly and don’t require too much concentration – instant gratification and able to watch tv too!  Perfect for beginners and experts alike, you’ll be hooking a pair up to match different outfits as well as friends and family.  Using double knitting yarn and a 5mm hook, the pattern has the added benefit in Baby, Child and Adult sizes.

If you love what you see but are not a little craft-y person, then please get in touch through facebook or email fuzzyfingers@btinternet.com as I will gladly hook up a pair for sale...

I couldn't resist playing with colour and my favourite stripes ( plus it also helps to diminish the stash mountain!)...  I am tempted to tinker with the pattern and gauge, and use 4 ply yarn to really have some fun and try and create some Missoni-style stripes...These also look fab in a solid colour or self-patterning yarn.


Make 2.                                                
Ch 17 (29, 41)                                  

Row 1: dc in 3rd chain form hook, tr in same st, *skip next ch, (dc, tr) in next ch*, rep to end, turn
Row 2: ch 1, miss first st, *(dc, tr) in next st, miss next st*, rep to end, turn

Repeat row 2 until piece measures approx. 2 (3, 3.5) inches,  or [5, 7.5, 9cm], ending with a WS row.


Thumbhole row (RS): ch 1, miss first st, (dc, tr ) in next st 2 (3, 4) times, ch 4 (6, 8 ), miss next 2 (3, 4 ) pattern repeats, continue in pattern to end, turn.

Next row (WS): ch 21, *miss first st, (dc, tr) in next st * rep to chains for thumbhole, [miss first ch, (dc, tr) in next ch] rep 2 (3, 4) times, continue in pattern to end, turn.

Continue repeating row 2 to match first half up to thumbhole row, ending with a WS row.  DO NOT FASTEN OFF. Turn.
 
Seaming/Joining row: ch 1, bring foundation row of mitt up behind and slip stitch both edges together, working through both thicknesses.  Take care to match the stitches as you work along to create a super neat finish (pin in place if you prefer).
Fasten off, weave in ends.  Voila! Cosy and stylish warm hands are now yours…
Written pattern copyright Aimie Bennett 2012. Please do not reprint or repost this pattern, but please feel free to link to this page to share this pattern with others.
Please can I ask that if you use this pattern to make items for sale, then credit the original pattern design to FuzzyFingers.  Many thanks and happy hooking!!


Tuesday, 16 October 2012

Cosy Handwarmers...

Now autumn and the cooler weather has definitely arrived and is making itself felt, I have found out my warm and cosy outer clothing.  I love autumn, the rapidly changing colours of leaves, the last flourish of flowers and the nights drawing in - I don't however like feeling cold, particularly my hands and feet.  When I'm outside, I always have on a pair of comfy and practical wrist or hand warmers. 

These fingerless gauntlets are great as they are super cosy and warm yet amazingly practical as your fingers are not covered so are free to hold the steering wheel, school bags, dog leads, use your mobile, etc.  With a slit for your thumb, they fit securely and snugly to keep you toasty.  As someone who has dexterity and grip issues, I've found that simply keepng your wrists and the blood flow through this area warm, I don't suffer with the numbing sensation that being cold brings.  In theory this reduces the amount of times I drop things, knock things over and breakages but remains to be proven in practise.  Even my 5 year old calls me butter fingers at least once a day...

Continuing on from the from the two free hat patterns, I am spreading a little more crochet love and  have designed two super simple wrist warmer patterns - perfect for beginners and experts alike.  There is plenty of scope for customising your handhuggers so let your imagination and creativity loose.  I always tend to make my handhuggers a little longer through the wrist section so as to cover a bit more wrist and this is so easy to do. 

A simple pattern that gives instant gratification as they are a quick project with a simple pattern .  Raid your yarn stash as they only use a small quantity of double knitting yarn.  Lightweight and fairly stretchy they just feel so toasty - you can whip up a couple of sets.  In fact I always have a pair in the 'glove' compartment (haha!) for those days when I forget to pick up a set or the weather changes while you're out...
Baby version

In a multi size pattern, they're perfect for adults and even more practical for babies and children.  I never was very good at steering tiny fingers into gloves so find that these are perfect.  The little thumbhole means they stay on nice and securely and for those independent little ones, they can put them on themselves.

Enjoy the pattern and feedback gratefully received...

Handhugger pattern...

Using double knitting yarn and a 5mm hook – gauge is really not that important.
UK crochet terms used
Make 2

Ch 20 (30, 40)
Row 1: dc in 2nd chain from hook, *ch 1, sk next st, dc in next ch*, rep to end, turn
Row 2:  ch 1, dc in same st, * dc in ch-1 sp, sk next st, ch 1*, rep to last ch-1 sp, dc in sp, dc in last st, turn
Row 3: ch1, dc in same st, *ch 1, sk next st, dc in next st*, rep to end, turn

Continue and repeat rows 2 and 3 until work measures 5.5, 7, 9 cm, ending with a WS row.

Thumbhole row (RS): ch 1, dc in same st, pattern next 8 (9, 11 ) sts, ch 4 (5, 7), continue in pattern to end, turn.


Next row (WS): ch 1, dc in same st, patt to thumbhole and resume pattern across thumbhole chains and on to end, turn
 

Continue and repeat rows 2 and 3 as before until work measures the same as first half (up to thumbhole), ending with a WS row. DO NOT FASTEN OFF.

Seaming/Joining row:  Turn, ch 1, bring foundation row of mitt up behind and slip stitch both edges together working through both thicknesses.  Take care to match stitches and chain-1 spaces as you work along for a super neat finish.


Fasten off and weave in ends.


Written pattern copyright Aimie Bennett 2012. Please do not reprint or repost this pattern, but please feel free to link to this page to share this pattern with others.

Please can I ask that if you use this pattern to make hats for sale, then credit the original pattern design to FuzzyFingers.  Many thanks and happy hooking!!


Like what you see but not crafty?  I will gladly hook up a set for you.  Get in touch via Facebook or email fuzzyfingers@btinternet.com.

Watch this space for another free pattern coming soon...

Monday, 1 October 2012

Little Star Hat

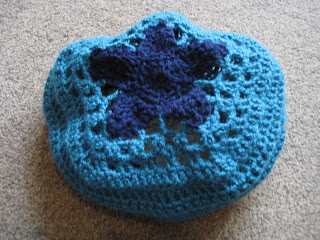
I have been trying my hardest recently to follow my own self-imposed better habits, one of which is to actually write down and record my patterns.  Following on from my Flowertot Hat, I have designed the Little Star hat for all little dudes.   This is a funky star design based loosely on a granny design, (a pentagon this time and this lends itself to a great fitting beanie shape) and allows some fun to be had with making it as individual as the wearer.  You can work it in one solid colour, double crochet the outline of the star to make it pop!, or crochet the whole star in a contrasting colour....have fun and play!

This pattern is easy to scale up or down for adults or tinier tots by working in a different weight yarn (aran or 4 ply) as well as altering hook size. After crocheting for a while, you soon get to know whether you're a loose 'hooker' or a slightly more snug one!!   Please feel free to let me know any comments, errors (ahem, I hope not) or feedback as I would love to know what you think. 

If you're not a crocheter and want to buy or order the hat, please message me through facebook or email me fuzzyfingers@btinternet.com . May I also add that if you make any hats for sale then please please please credit the pattern to me, FuzzyFingers. There will also be a link to the pattern through Ravelry. Have fun and happy hooking!

Little Star Hat

Double knitting yarn approx. 150m - 200m

5mm hook (or size needed for gauge)

Approx circumference  Smaller size 46 cm (18 inch)

                                           Larger size  50 cm (19.5 inch)


Approximate gauge 17 tr to 9 rows over 4inch (10cm) square
UK crochet terms used

Based on a star design set into a granny pentagon, this cute hat is sure to make your little one dazzle.  Worked in either one colour or switch to a contrasting or complimentary shade for round 3 to make the star really pop, or crochet rounds 1-3 in an alternative colour and make this hat your own. 
Love the pattern but want to change the size?  Then try a smaller hook and 4 ply yarn for a smaller fit or go up up and away to a larger hook and aran/worsted yarn for teen/adult sizes.  Also, the depth of the hat can be increased by extending the straight rows between 7-13 (8-15), or adding extra half treble rows to the brim.


 Ch 4, join with sl st to form a ring

All sizes:

Round 1(rs): ch 3 (counts as tr here and throughout) 14 tr in ring   - 15 sts

Round 2: (ws): ch 7 , *dc in 2nd ch from hook, htr in next ch, tr in next 2 ch, 2 dtr in last 2 ch, sl st to 3rd ch tr of circle, rep 5 times, sl st to base of first arm of star, turn

Round 3: ch1, dc in this st and each st to end of star arm, 3 dc in point of star, swivel and work dc in bottom arm of star, dc in bottom of ‘valley’ between star arms, * rep to end, sl st to first dc to join, turn

Round 4: ch 6 (counts as dtr, ch2 ), htr in 4th dc from hook, *ch2, 3 dc into top of point, ch 2, miss 1 dc, htr in next st, ch 2 **, miss next 3 dc, dtr in st at base of ‘valley’, ch 2, miss 3 dc, htr in next st, rep from * 4 more times ending at **, ch 2, sl st in 4th ch to join, turn  - 66 sts


Round 5: ch 3, tr in same st, ch 1, *2 tr in htr, ch 1, (2 tr in middle dc at top of point, ch 1) twice [corner made], 2 tr in htr, ch 1 **, 2 tr in dtr, ch 1, rep from * to end 4 more times, ending at **, sl st to join, turn  - 15 tr-2 groups + 5 corner groups

Smaller size


Round 6: ch 3, tr in each ch-1 sp, tr in each tr, rep to end, sl st in beg ch 3 to join   -  75 sts

Round 7 -13: ch 3, tr in each st to end, join with sl st in beg ch 3, turn

Round 14: ch 3, tr in next st, *ch 1, miss next st, tr in next 2 sts,* ch 1, rep to end, ch 1, sl st in beg ch 3 turn

Round 15: ch 2, htr in same st, * htr in ch-1 sp, htr in next 2 sts, miss next ch-1 sp, htr in next 2 st* , rep to end, sl st to join, turn    -  64  sts

Round 16-18 : ch 2, htr in same st, htr in each st to end, sl st to join.

Fasten off and weave in ends.

Larger size
Round 6: ch 3, tr in ch-1 sp, ch 1, 2 tr in next ch-1 sp, *ch1, (2 tr, ch 1, 2 tr) in next ch-1 sp [corner],**ch 1, (2 tr in next ch-1 sp) 4 times, rep a total of 4 times, ending at ** , then ch 1, 2 tr in next 2 ch-1 sp, ch 1, join, turn   -    20 tr 2 groups + 5 corner groups

Round 7:  ch 3, tr in each ch-1 sp, tr in each tr, rep to end, sl st in beg ch 3 to join  -   89 sts

Round 8- 14   : ch3, tr in each st to end, join with sl st in beg ch 3, turn

Round 15: ch 3, tr in next st, *ch 1, miss next st, tr in next 2 sts,* ch 1, rep to end, ch 1, sl st in beg ch 3 turn

Round 16:  ch 2, htr in same st, miss next ch-1 sp, *htr in next 2 sts, miss next ch-1 sp, htr in next 2 st* , rep to end, sl st to join, turn  

Round 17 – 19: ch 2, htr in same st, htr in each st to end, sl st to join.

Fasten off and weave in ends.

 
Please can I ask that if you use this pattern to make hats for sale, then credit the original pattern design to FuzzyFingers.  Many thanks and happy hooking!!

Written pattern copyright Aimie Bennett 2012. Please do not reprint or repost this pattern, but please feel free to link to this page to share this pattern with others.  Be sure to like FuzzyFingers on facebook.
 

Monday, 24 September 2012

Cute as a button...

Apologies again as I seem to have sadly neglected my blog.  Life seems to have taken over and ther's never enough hours in the day - I'm sure you're all familiar with the same complaint!  What with fending off the usual coughs and colds resulting when all the kids return to the classroom and share their bugs, I've been job hunting, preparing for a craft fair, amongst other things.

I've been meaning to make some baby and toddler hats for what seems like for ever and now we're having some gorgeous crisp and sunny autumnal weather here in the UK, I've been spurred on to designing some.  I've even gone so far as writing up the pattern which is a new habit I need to most definitely keep up.


Based on a flower set in a granny square, I've  come up with the Flowertot hat (boy friendly version being worked on as we speak!).  Worked in double knitting yarn on a fairly large hook, this is wonderfully soft and stretchy with the aim of being both stylish and practical.  With the cute flower and slightly open top so baby is warm but not too hot, and the addition of a simple picot edge, this hat will be perfect for the upcoming colder months.  This pattern is easy to scale up or down for adults or tinier tots by working in a different weight yarn (aran or 4 ply) as well as altering hook size.  After crocheting for a while, you soon get to know whether you're a loose 'hooker' or a slightly more snug one!!

I've decided to make  a few patterns available FREE - everyone's favourite word! - and share the crochet love.  Please feel free to let me know any comments, errors (ahem, I hope not) or feedback as I would love to know what you think. 

If you're not a crocheter and want to buy or order the hat, please message me through facebook or email me fuzzyfingers@btinternet.com .  May I also add that if you make any hats for sale then please please please credit the pattern to me, FuzzyFingers.  There will also be a link to the pattern through Ravelry.  Have fun and happy hooking!


Flowertot Hat

Double knitting yarn approx. 150m
5mm hook
Approx circumference 46 cm (18 inch)
Gauge 8 tr x 5 rows to 2 inch square
UK terms used

 
Ch 4, join to form a ring
Round 1: (rs) ch 5 (counts as tr and ch 2 sp), *tr, ch  2* 7 times, join with sl st in 3rd ch of beg ch 5, turn
Round 2: (ws) sl st in next ch-2 sp, ch 1, (dc, ch 1, tr, dtr, tr, ch 1, dc) in same sp (petal made), *(dc, ch 1, tr, dtr, tr, ch 1, dc) in next ch-2 sp* rep * * to end, join with sl st in first sl st – 8 petals made, turn
Round 3: ch 1, pulling petals forward and working round post of each tr on round 1, dc round back of post of first tr, *ch 3, dc round back of post of next tr**, ch 5 (corner made), dc round post of next tr, rep from * 3 more times ending last repeat at **, ch 1, join with tr in first dc, turn
Round 4: ch 3(counts as first  tr here and throughout), 2 tr round post of joining tr, *ch 1, 3 tr in next ch-3 sp**, ch 1, (3 tr, ch 1, 3 tr in next corner ch-5 sp, rep from * 3 more times ending at **, ch 1, 3 tr in last corner, ch 1, join with sl st in 3rd ch of beg ch 3, turn
Round 5: ch 3, 2 tr in same sp,  *ch1, 3 tr in next ch-1 sp, 3 times,** ch 1, 3 tr in same sp as last worked (corner made), then work from * 2 more times, ending at **, ch 1, join with sl st in 3rd ch of beg ch 3, turn
Round 6: ch 3, 2 tr in same sp, ch 1, * 3 tr in next sp, ch 1* to end , join with sl st in 3rd ch of beg ch 3, turn
Round 7: ch 3, tr in each tr and ch 1 sp, rep to end, sl st in 3rd ch of beg ch 3, turn

Round 8: ch 3, tr in next 6 sts, 2 tr in next st, *tr in next 7 sts, 2 tr in next st* rep to end, sl st in 3rd ch of beg ch 3, turn (72 sts)
Round 9-15: rep round 7
Round 16: ch 1, *dc in next 7 sts, dc2tog over next 2 sts,* rep to end, turn (64sts)
Round 17: ch 2, htr in st at base of ch, htr in each st to end, turn
Round 18: ch 1, dc in same st, *ch2, miss next st, dc in following st*, rep to end, join with sl st in beg dc.
Fasten off and weave in ends.  Feel free to decorate with button or flower detail.


Written pattern copyright Aimie Bennett 2012. Please do not reprint or repost this pattern, but please feel free to link to this page to share this pattern with others.  Be sure to like FuzzyFingers on facebook.


Christmas Fair Saturday 1 December

It seems to be the countdown to the big day starts earlier every year and as some one who has a November birthday, I've grown used to ...